I can't tell you how much I love thrifting! Finding something unwanted and fixing it up to something pretty is one of the best feelings!
This post is to help you see how easy it is to re-wire a lamp and fix it up a little!
Why re-wire? Most lamps I see at the thrift store have ugly-flimpsy-old brown cords that are unsightly. I like having clear cords so they don't stand out when they're plugged into a wall!
I stopped at Habitat for Humanity a few days ago with my kids and saw this lamp sitting on the floor. It actually caught my eye because it was so ugly. After looking at it I noticed how interesting the glass bottom was and that got me thinking about what it would take to fix it up. I stood there switching lamp shades on it to see if I could find one that would make it look better. After 10 minutes trying to decide if I should get it I finally took it up to the front desk. I was actually embarrassed to have it in my cart!
I ended up switching lamp shades from the original (one of the workers said I could).
Here's a close-up of those lovely flowers!
It felt so good to pull the flowers out (and all the dead flies too)!
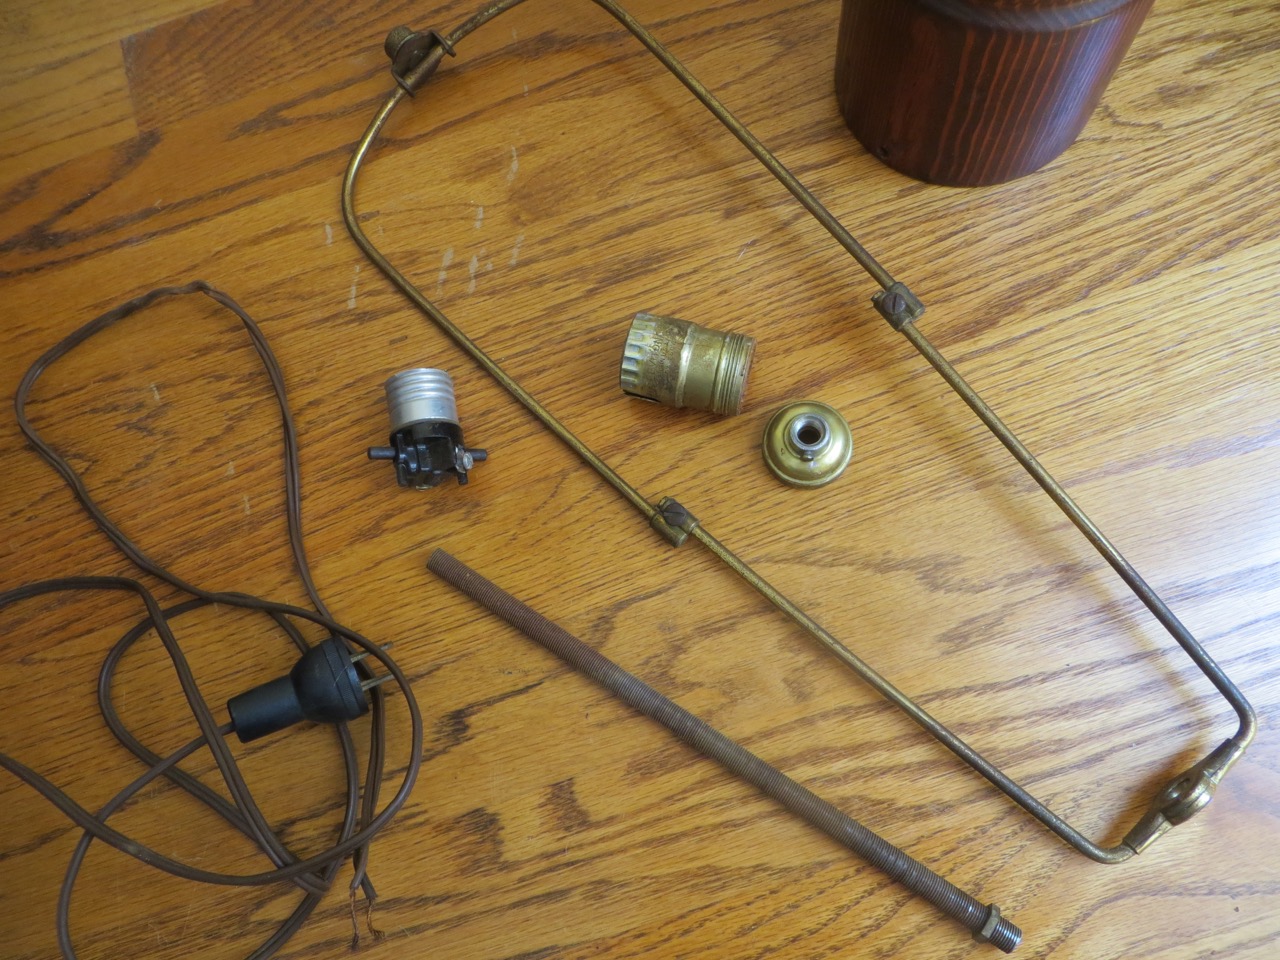
TIP: All lamps are different and disassembly/assembly will be slightly different for each one. I recommend taking pictures as you pull your lamp apart so you know how to put it back together.
Make sure your lamp is unplugged before disassembling the light socket! Take the light bulb out, unscrew any bolts that are tightening the socket at the lamp base (mine was inside the neck of the glass bottom), slide off cover that goes around the socket (not pictured), pull down the bottom cover of socket to expose wires.
Unscrew wires from socket. Now your wires are free to pull out and throw away!
I gave the base a much needed bubble bath!
I gathered the pieces I wanted to spray paint. TIP: inside the socket cover is a cardboard sheath for insulating (pictured below)... pull that out so you don't spray paint it.
Put the cardboard sheeth back in when paint is dry!
Here are the pieces ready to be assembled. I got my new clear lamp wire from Amazon for about $6!
Push wire through lamp base and center of threaded rod. Attach any hardware that was on bottom of rod before you took it apart. Mine had a bolt and large washer.
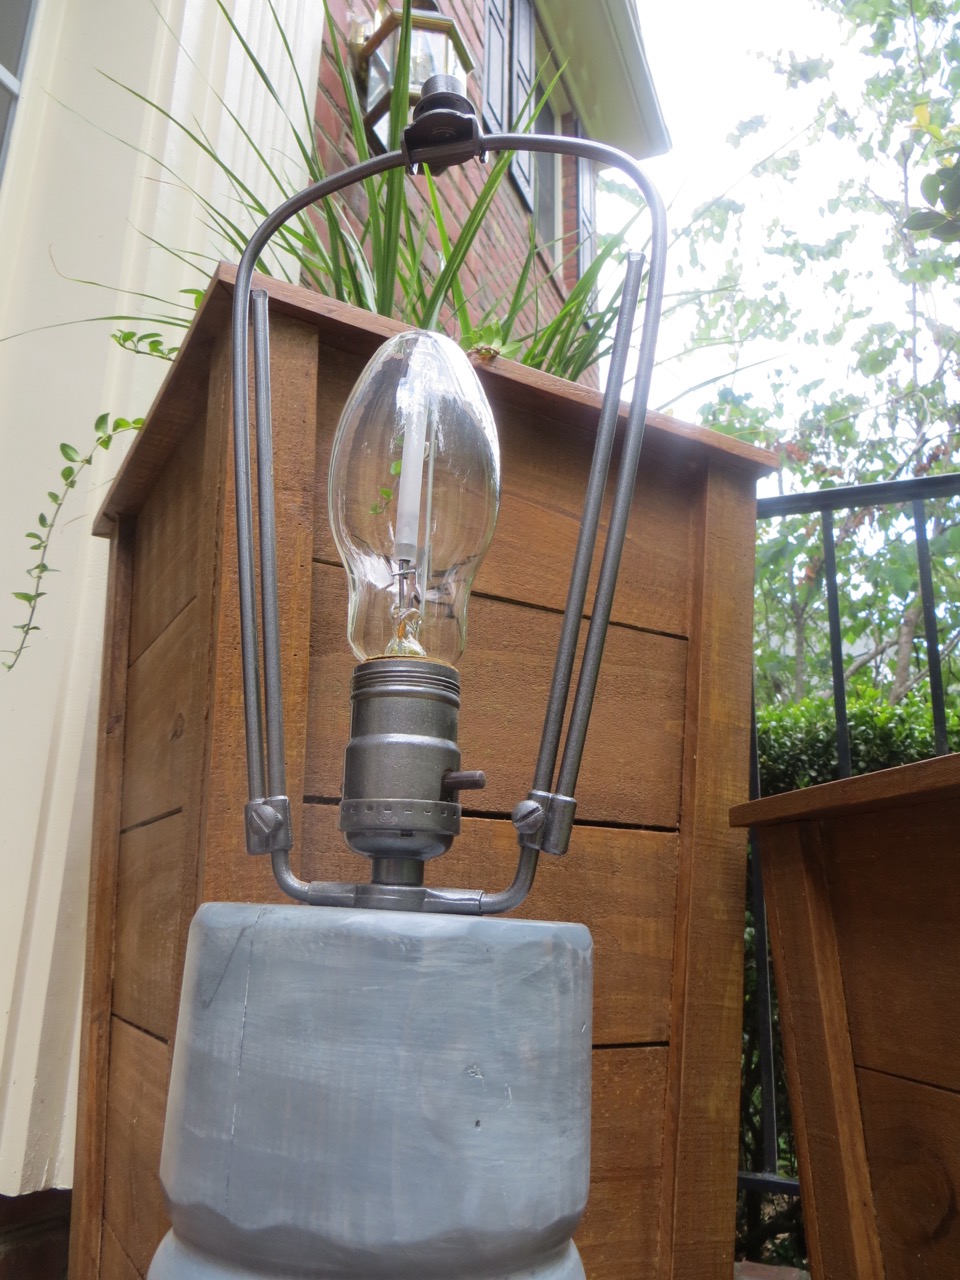
The threaded rode goes through to the base of the lamp for the socket to attach. Before the socket goes on you'll want the bracket for the harp and then the base where the light socket sits.
The packaging for the cord said to make an underwriter's knot (interestingly enough, this is the same knot you do for sewing machine motor's)!
(image from familyhandyman.com)
Which wire do you connect to which screw? The diagram above is very helpful. Basically you'll notice there are some ribs in the rubber coating on one of the wires - this is your neutral wire and it screws onto the silver screw. Your other wire is the 'hot' wire and goes on the golden screw. To read more about neutral and hot wires (and why they're important) you'll find a great explanation, here.
You want your wires going around the screw from the left to the right so when you tighten the screws it won't make your wires slip off. Tighten the knot on the wires against the socket and push socket into base. Slide socket cover on.
Attach harp and find a lovely shade that will compliment your lamp base! I was lucky enough to have been given one many months ago and had it sitting in our front room!
Pretty awesome for a $15 lamp and only $6 put into it!
I love the plump-y curves!
Interested in re-wiring a chandelier or learning how to hang it from the ceiling? Click here.
UPDATE: I found a new lamp base to fix up shortly after doing this post and thought I could show how this one is different - maybe one of these resembles one you're working on better than the other! :)
Bottom view
This cord was in rough shape - see those exposed wires?
Pieces off and will need a good scrubbing to prepare for paint!
The wood was dry and splitting on the ends so I cut some from the top and bottom - especially the uneccesary hole on the top. I drilled new holes in the bottom for the cord to pass through.
I sanded the old finish off and gave it flat edges with my sander to break up the roundness.
I did a coat of Gel Stain and sanded lightly.
I used the same rag from staining and dipped it very lightly in latex paint and wiped on very quickly. I used a spray Polycrylic to finish off the base.
Ready for a new finish of paint!
Pieces ready for assembly!
I started my new wires in...
... had to guide them down through the center...
... up through the rode and out.
At this point I realized that little nut underneath the harp should be hammered down into the wood so the harp would be more stabilized by resting against the flat base. I didn't want to pull my wires all the way out so I used a socket to go around the threaded rod but still rest around the nut and hammered it down. Tighten the screw on socket base.
I still haven't found a shade that works with this base - but I'm glad to give it new life!
Labels: DIY, electrical, re-wire light fixture, tutorial