(Here's Part 1, Part 2 and Part 3 of this build series)
I can not express the stress I've felt over this desk, especially the last month in finding the perfect stain for such a huge project that I've invested so much time & money into. I prayed so much over this project... not just that I would be safe in the shop building but that I would be happy with the final product. After all, this thing is going to be handed down from generation to generation (I hope)!
I asked my professor what stains he recommended and he basically said stay away from Minwax (which is the only thing I've used, ha!) because they have hardly any pigment in them. He recommended "General Finishes" brand at our local Woodcraft store. I wanted some sort of old-gray look which they definitely didn't have. I picked 2 colors that I thought I could mix; Walnut & Whitewash. I decided on their water-based stains (clean-up is a breeze and safest for a big pregnant lady to apply).

Here is my sample board (just one of many)! I liked the one second from the left the best but thought it was still too dark and a bit too gray.

I headed back to Woodcraft and picked up this Antique Oak hoping it would add just a touch of brown.

I also got this pre-stain to add to my mixture to make the color less dense.
My final mixture ended up being equal parts Walnut, Whitewash and Antique Oak with 1/2 part Pre-Stain. I dumped everything into a large gallon paint can and was ready to go!
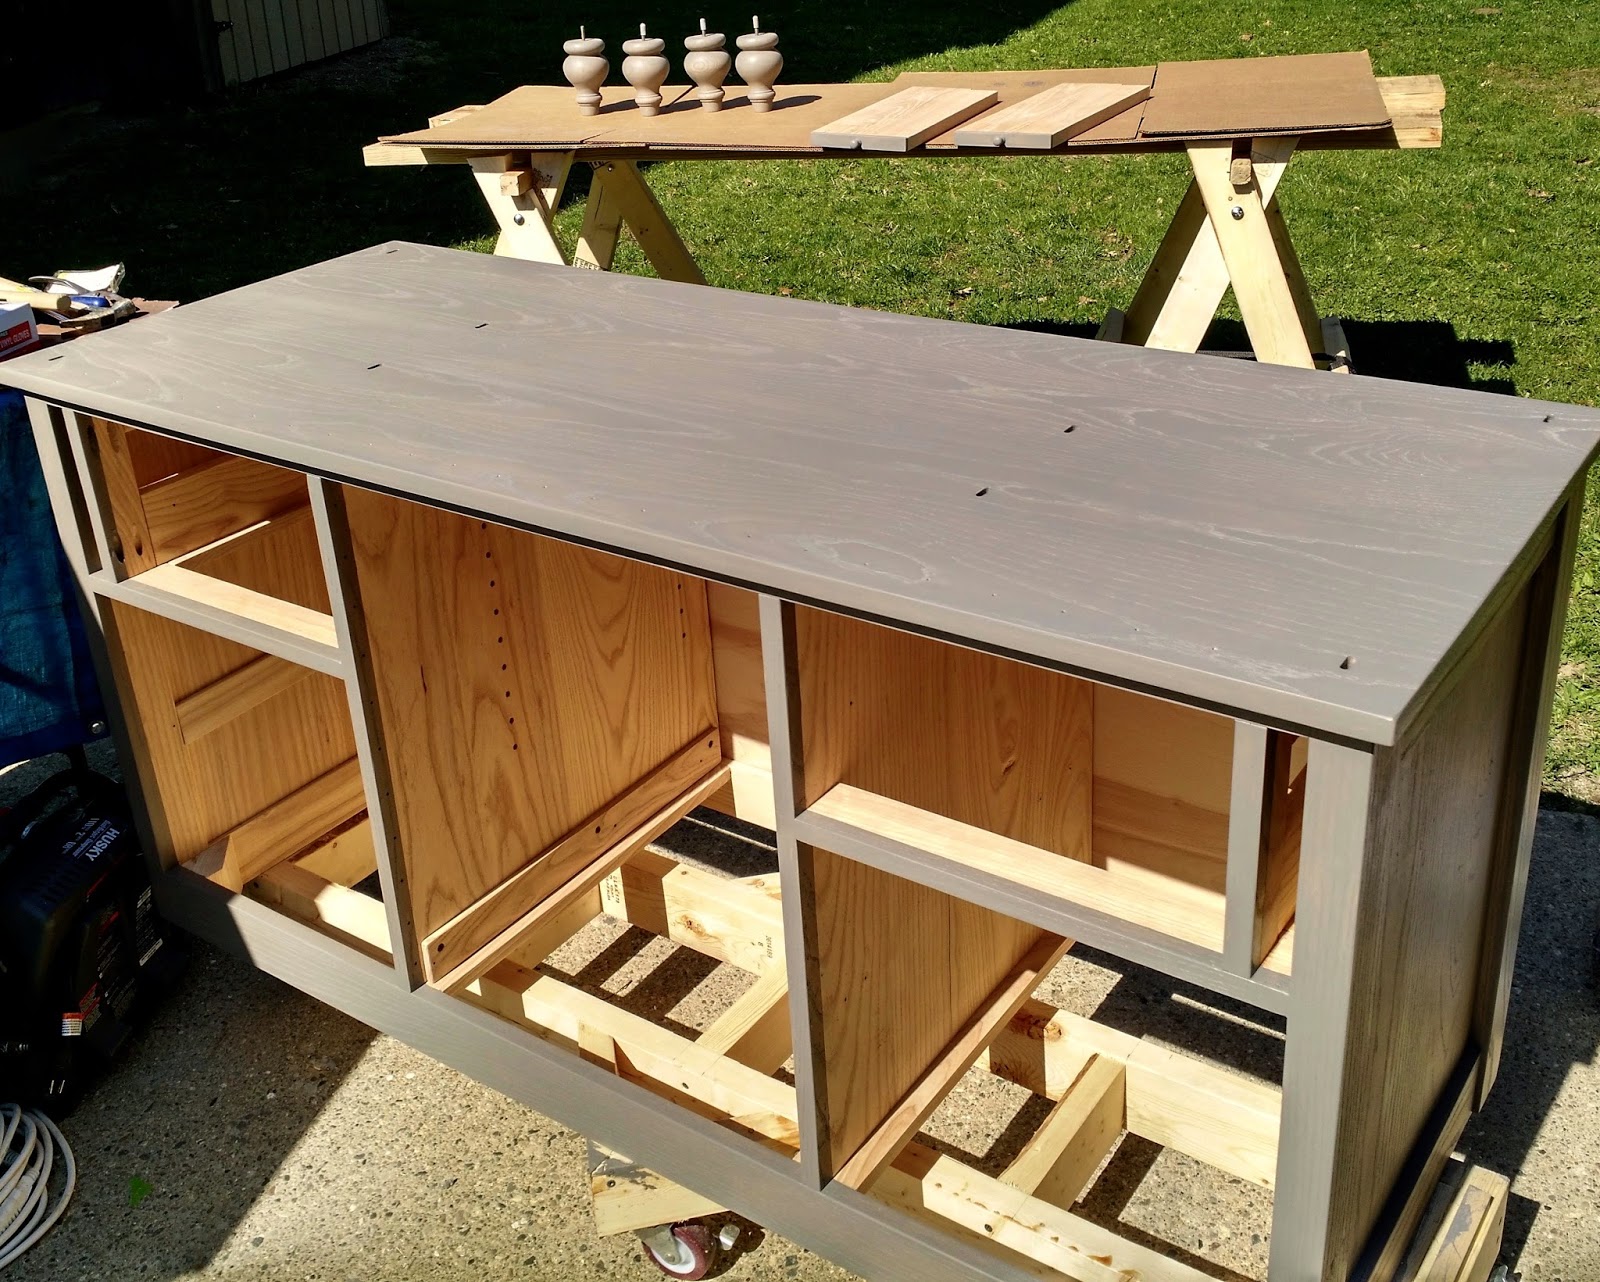
First things first; I rushed to Home Depot and picked up some lumber to make myself some sturdy sawhorses that would fold up for storage and some emergency tarps in case it rained. After many hours of building in the sun I was finally ready to get some work done!

I attached my backs (I had to pre-drill holes for my small nails because the Ash is so hard it would bend my nails every time... UGH!), then I taped off where I didn't want the stain. I was fretting over staining and wiping it all over on the inside corners and crevices and solved the problem by simply NOT doing it.

Let me just tell you about my favorite "painters tape"... Frog Tape! It was so
easy to apply and didn't allow the stain to bleed under it.

First coat of stain! I applied it nice and thick so it wouldn't dry so fast (why water-based is so hard to work with). I worked in sections, from the top-upward (if I dropped some stain on any lower part it wouldn't take hold so quickly and make a big spot). I applied another coat of stain and then did a really quick 3rd coat wiping off right after I brushed it on.
I took the tape off and lightly sanded with 220 grit paper and roughed up the edges a bit to look like it was worn.

Nice, seamless line.. right!? By the way I fell in love with General Finishes after seeing how it left my wood feel super smooth (even without sanding) and it didn't smell (Minwax smells for nearly a month after)!
Okay, now the clear-coat. All I ever used was stuff I could buy at my local hardware store... Mostly Minwax Polyurethane. WHY didn't I know about the good stuff before!? Off course when I asked my professor what he recommended he said __________, but it costs about $100 for a gallon! I was a little shocked but I thought.. Hey, I'm okay spending that because I want this desk to be awesome!

He recommended Ceramithane which I could buy at our local Andersen Paint Company. Before buying it I made sure to read reviews and to know exactly how to apply it and the process of doing so. I was so glad to read I would be able to use a sprayer... but of course I didn't have a sprayer and had never used one! More stress!! Anyways, I ended up buying the Ceramithane with a discount for about $83 and bought an HVLP sprayer from Harbor Freight. I got the sprayer for under $100 with a 20% discount, and although it's not a "professional" sprayer it saved me so much time and headache! It took about 15 minutes to spray my large top and bottom pieces, inside and out. Hardly any runs I had to fix and if I did, I brushed them off and the Ceramithane leveled out beautifully. Next, I sanded lightly with a 500 grit paper and did another coat.

Just waiting to cure more so I can take them inside! Eek!

I had to wait a WHOLE rainy weekend before I could pull out my drawers and doors to stain and finish.

See my nifty sprayer? It's so easy to clean, too! All I have to do is pull apart the nozzle area and clean everything with soap & water (since my finishes were water-based). I will get so much use out of this thing. Also, check out my sweet sawhorses (I think all my neighbors are jealous)! Something else I'll used often!

I made holes in my bottom and hutch for domino's to keep everything secure but still super easy to take apart for moving. Again, allowing for expansion, the domino holes in the hutch are more oblong in the middle and back areas of the hutch.
FINISHED!!


.jpg)
I'm glad the color turned out nice and I like the lighter/darker areas with the worn-edge look. I've never worked with Ash before and I really like how the grain is exaggerated with the light.
Approximate Cost breakdown:
Wood $530
Hinges, Knobs, Bun Feet & Hardware $160
Stain & Pre-Conditioner $60
Ceramithine Protective Coat $100
HVLP Sprayer $95
Random Brushes, Rags, Tarps etc. $80
Total $1,025
Even though there were times I thought it wasn't worth building and I wish I had never started, I am thrilled it's done, that I was able to learn new things and that I was able to have an evening to myself each week (for 9-months) and do something I love.